26 February 2015

Pizza Dough Balls


What's not to love about these delicious pull apart pizza dough balls. They're fun, they're fluffy, and so family friendly. I'll quite often make them on the weekend for a mid afternoon family snack, or if friends are coming over, they're such a lovely way for people to snack before hitting the dinner table.

They're stuffed...which means you can stuff them with anything. Go vege with simple roast garlic tomato, ricotta and loads of basil, or beef them up with a mix of bacon, salami, gooey mozarella cheese, and a heap of shredded oregano. I love to make garlic pizza balls and serve them with pesto or a simple tomato sauce. I haven't gone into details about the quantities you'll need in the filling, just mix the fillings together, taste and add ingredients to taste.

Pizza Dough Balls

For the dough

  • 1 cup warm water
  • 2 teaspoons dried yeast
  • 1 tablespoon sugar
  • 3 tablespoons oil
  • 1 teaspoon salt
  • 2 and a half cups flour

Fillings................

Beef it up

  • tomato sauce
  • mozarella 
  • chopped salami
  • chopped and fried bacon
  • fresh oregano chopped
  • chopped garlic
  • salt and pepper to taste

Vege time

  • roasted garlic, chopped
  • ricotta
  • wilted spinach leaves
  • chopped basil
  • parmesan cheese
  • salt and pepper to taste

Method

  1. Combine the water, sugar and yeast, stir and stand for 5 minutes to froth.
  2. In a bowl, mix flour, oil and salt. Add yeast mixture, mix well and knead for 10 minutes, or pop into a mixer and knead with a dough hook for 5 mins.
  3. Pop into an oiled bowl and leave in a warm place to rise for 2 hours
  4. Break the dough into large marble sized pizzas. Press flat into a circle, fill with your choice of toppings, pinch tops together and place upside down into a oven dish.
  5. Repeat with all the dough, leaving a small gap between each pizza ball.
  6. Leave to rise for 30 minutes and then top with grated parmesan cheese
  7. Bake at 400 degrees fahrenheit (200 degrees celcius) for 10 to 15 minutes until well risen, golden brown and cooked through.
  8. Serve with tomato or pesto dipping sauce and ENJOY!!


11 January 2014

Steamed Prawn and Spring Onion Rice Rolls


Some days I wish I could pop out for Dim Sum, but the very few Chinese restaurant there are in Doha don't do Yum Char. One of my favourite dishes is steamed rice rolls - they come with various stuffings, beef and spring onion, pork and water chestnuts, and one of my favourites is quite simply prawns and spring onion with crispy pork skins on top. I've never made steamed rice rolls before so I thought I'd give it a go, after a couple of failed attempts, largely because I was using a glass tray, rather than tin or metal, they were easy to produce - incidentally the failed attempts tasted great, they just didn't look too pretty. The hero of the dish is the sauce, the rolls themselves provide the texture, the sauce packs a wollop of flavour, and the combination is sublime.

Steamed Prawn and Spring Onion Rice Rolls

  • 140 grams Rice Flour
  • 5 tablespoons Tapioca flour (or tapioca pearls, ground in a spice grinder)
  • 2 1/2 tablespoons cornflour
  • 2 tablespoons vegetable oil
  • 2 cups water
  • oil for greasing

for the filling
  • 300 grams raw prawns, peeled, deveined, and chopped
  • 4 spring onions, cleaned and chopped

for the sauce
  • 50ml light soy sauce
  • 50ml water
  • 2 tablespoons sugar
  • 1 thai red chili chopped finely
  • 1 clove garlic, minced
  • 1cm thumb of ginger, julienned

Method

1.   Mix the flours together, and add oil. Use your hands to rub in the oil, so that it resembles breadcrumbs and gets rid of any lumps. Add water gradually, stirring with a whisk to remove the lumps. Let the batter rest for 15 minutes and whisk again.


2.   Combine all of the sauce ingredients in a pot, heat over a medium heat until the sugar has dissolved.

3.   Cook the prawns over a medium heat, stirring well until pink. Set aside.


4.  To make the rolls, brush a metal pan with oil (I used a disposable foil takeaway container), pop into the wok set over boiling water for 1 minute to allow the bottom to heat. Mix the batter again and ladle in a small amount, spreading as thinly as you can. Sprinkle on the cooked prawns and spring onions. Cover and steam for 3 to 4 minutes until the batter is opaque and firm. 


5.   Remove from the heat, and using a spatula, carefully roll the rolls up as you remove them. The photos below show a plain roll, no filling, to show the method. The filled ones need to be as thin as you can to ensure they roll easily.


6.   Serve the rolls hot with a generous amount of the sauce poured over top. Adding extra spring onion and chillies (optional) for a garnish.


7 January 2014

Chicken and Prawn Jambalaya


I tend to head to South East Asia in my cooking when I'm looking for spice - this dish is one of my exceptions. Jambalaya is a cajun dish, originating from the Caribbean Islands, and very popular in the Southern States. The best jambalaya I have eaten was in a tiny little Creole cafe in New Orleans. Jambalaya is a lovely blend of spices and rice, and you can pretty much throw anything in there, traditionally it's a bit of a surf and turf number with prawns, chicken and spicy sausage. 

One of the things I love about this dish is that the devil is in the preparation, you feel like you're chopping for Africa, but once the ingredients are ready (which can be prepared earlier in the day), the dish takes 10 minutes to start the cooking process and another twenty or so to cook (all on it's own - isn't it clever?), and then you can sit down and enjoy it. 


Cajun Jambalaya

  • 200 grams of chicken cut into strips
  • 2 tablespoons vegetable oil
  • 1 red onion, chopped finely
  • 2 cloves garlic, minced
  • 100 grams bacon, chopped
  • 2 chorizo sausages, chopped into 1cm slices or cubes
  • 1 green capsicum, diced
  • 1 red capsicum, diced
  • 1 red chile, finely chopped
  • 3 teaspoons cajun spice mix
  • 1 teaspoon paprika
  • 2 cups long grain rice
  • 250ml lager  beer
  • 400 grams of canned diced tomatoes, or 3 large tomatoes, chopped finely
  • 3 cups chicken stock
  • 1/2 teaspoon saffron threads, soaked in 3 tablespoons warm water (optional)
  • 200 grams large prawns, peeled and deveined

Method

1.   Heat the oil in a deep wok or pan, and fry the chicken for a few minutes until lightly browned. Remove from the pan with a slotted spoon.

2.   Add the onion to the pan and cook for a few minutes until softened, then add the bacon, sausage and garlic and cook for a few minutes until browned. Add capsicum, chile, paprika, and cajun spice and cook for 2 to 3 minutes.


3.   Add the rice, stir to coat and cook for a minute for the rice to absorb the spices. Add the beer and stir well. Stir in the stock, saffron and liquid and tomatoes. Simmer covered for 10 minutes.

4.   Add the chicken back in and the prawns and cook for a few minutes until prawns are pink and cooked through. Serve in bowls and enjoy!


23 November 2013

Nana's Christmas Cake


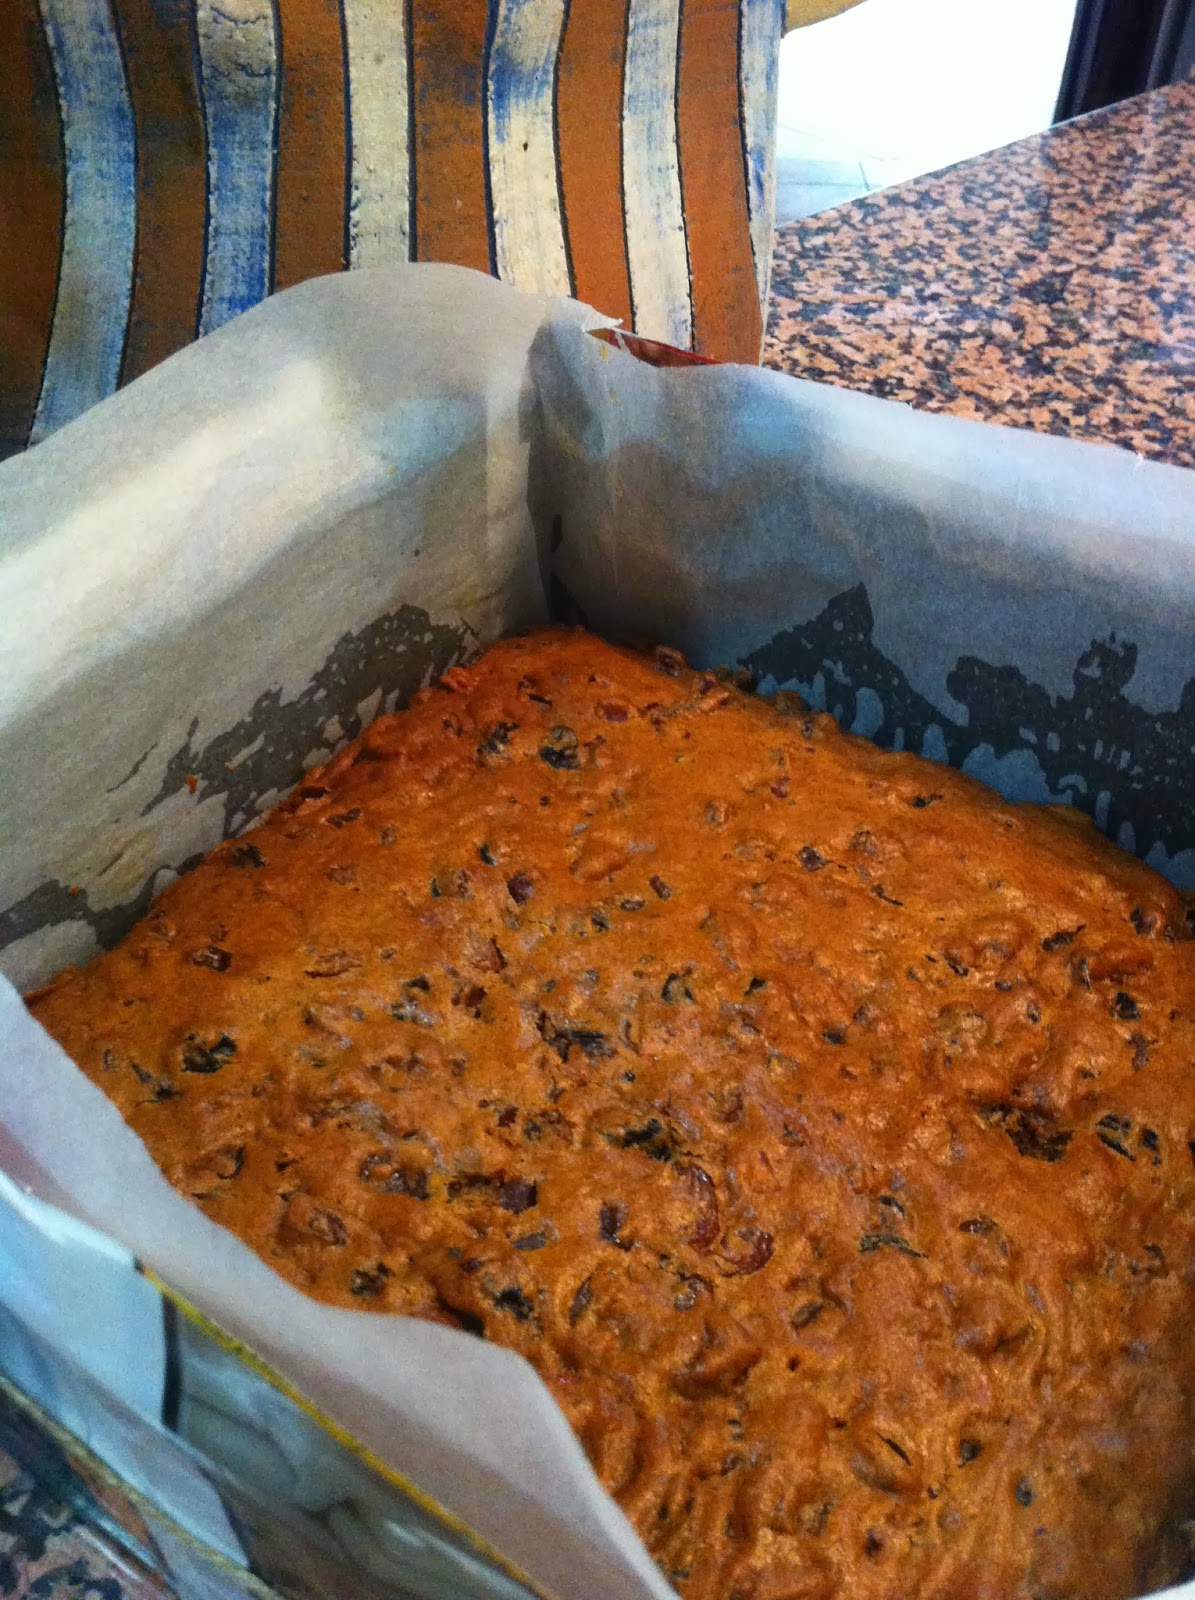
I remember, as a child, the ritual of making the Christmas cake. I remember mum carefully measuring out the ingredients, I remember her preparing the tin and tying newspaper around it, I remember licking the bowl when the cake was in the oven, and I remember the heavenly Christmas smell that filled the house for the 4 hours the cake was cooking.
I've taken up the tradition of the Christmas cake, and determined to mimic mum's I rummaged through her tattered much loved recipe book and found this recipe. Handwritten in mum's handwriting, the mum in Mum's Xmas Cake is actually my grandmother. So this recipe has been through 3 generations and when my children are ready to cook their first Christmas cake, that will make four. I hope you enjoy it as much as our family do.


Nana's Christmas Cake

  • 1 kilogram mixed fruit (I used currants, sultanas, and mixed peel)
  • 180 grams butter
  • 1 cup brown sugar
  • 1 tablespoon golden syrup
  • 1 teaspoon mixed spice
  • 1 teaspoon ground nutmeg
  • 2 teaspoons ground cinnamon
  • 2 tablespoons brandy (or 1 teaspoon brandy essence)
  • 1 teaspoon vanilla essence
  • grated rind of 1 lemon (or 1 teaspoon lemon essence)
  • 3 eggs
  • 2 1/2 cups plain flour
  • 1 1/2 teaspoon baking powder
  • 2 tablespoons milk
  • 1 teaspoon baking soda

Method

1.   Soak fruit overnight in 1 cup hot water. Bring to boil and simmer for 10 minutes. 


2.   Remove from heat and add in the butter, sugar, golden syrup, spices, brandy, vanilla essence and lemon. Stir to melt butter then leave to cool. Heat oven to 130 degrees celcius (250 degrees fahrenheit).


3.   Beat eggs and add to the fruit mixture. Dissolve baking soda in milk and add, and finally add sifted flour and baking powder. Mix well and pour into well lined 8 inch cake tin. Wrap newspaper around the tin and tie with string (this insulates the cake to prevent the edges burning while the middle of the cake is cooking).


4.   Place the tin in the oven, on top of a magazine (to insulate the bottom) and cook slowly for 3 hours. Check to see if a skewer comes out clean, if not then cook for another hour. Test again. Turn the oven off and leave the cake in oven to dry out.


5.   Put the cake into a container with a good seal. Poke holes in the cake with a skewer, and gently pour a few teaspoons brandy into the holes. Repeat every week. Store in a dark cupboard until Christmas. Cake is best made 2 months before Christmas.


8 November 2013

Chana Masala


I've been going through an Indian food phase recently, I love the combination of spices, which you can buy ready blended or in my case, I take such pleasure out of roasting the spices and grinding them together to create a wonderful curry powder. I bought a cheap as chips coffee grinder and it only gets used for spices, if you like using different spices, it's well worth buying as freshly ground is so muh tastier than pre-mixed powder.

Northern Asian food requires more time in the pan than SE Asian food. You need time to cook out the raw flavours in the spices, and time too for the flavours to develop and blend together into something that is greater than the individual spices that go into it. I'm also a big fan of using different kinds of protein, and one of my favourites is chick peas (garbanzo beans to the folks in the US).

Chana Masala

  • 2 tablespoons chana masala powder
  • 800 grams tinned chick peas
  • 2 tablespoons oil (not olive)
  • 1 cup finely chopped onions
  • 1 inch thumb of ginger, grated
  • 2 cloves garlic, minced
  • 1 large tomato, chopped or 1/2 cup canned chopped tomatoes
  • 1/2 teaspoon salt
  • 3 tablespoons freshly grated coconut (optional)
  • 5 small shallots (optional)

Masala Powder
  • 3 tablespoons coriander seeds
  • 1 tablespoon cumin seeds
  • 2 cardamon pods
  • 6 whole cloves
  • 2 dry red chillies
  • 1 teaspoon black peppercorns
  • 1 inch piece cinnamon
  • 1 teaspoon powdered ginger
  • 1/4 teaspoon nutmeg powder

Method

1.   If making the masala powder, roast the whole spices in a dry pan individually as they all take differing amounts of time to cook. Grind together in a spice grinder, and then mix with the dry ginger and nutmeg.


2.   Heat the oil over a medium heat, and saute the onion, ginger and garlic until onion is soft, add in the curry powder and cook a further 5 minutes, stirring constantly.


3.   Add the tomato, chick peas, and 3 cups of water. Bring to the boil, and simmer gently for 25 minutes. Taste and add salt to taste. I added a large chopped potato at this stage as well as I love curried potatoes, so tend to pop them in curries that don't typically have them in there. Stir frequently and if it starts to get dry then add more water. The final curry will be fairly dry.


4.   Blend the coconut and shallots together into a paste and add to the cooked curry, cook for another 2 or 3 minutes and serve with Indian breads like paratha or dosa and rice.


4 June 2013

Caramel Shortbread


I've posted a couple of recipes from my favourite chef, Peter Gordon - this is yet another of his. A delightfully light shortbread mixture topped with caramel and then topped with more of the shortbread mixture crumbled up.

The caramel mixture is quite simply a can of sweetened condensed milk, boiled for 2 hours and cooled - it's quite magical opening the tin and seeing caramel instead of white sticky condensed milk. I have no idea what the science behind it is, and why it works, but I enjoy the outcome and always boil 2 cans as it keeps in the fridge for about a month, and you can use the caramel in other recipes.


The only changes I make to his recipe is to use all of the tin of caramel (he uses two thirds of a tin) and to bake the shortbread base first, cool, spread on the caramel, crumble on the topping and bake again.


Caramel Shortbread

  • 1 tin of condensed milk (397g)
  • 250 grams unsalted butter, at room temperature
  • 150 grams caster sugar
  • 150 grams cornflour
  • 300 grams plain flour

Method
  1. To make the caramel, put the tin of condensed milk into a deep saucepan and cover with water, by at least 2 inches (I put a clean tea towel in the bottom of the pot to stop the incessant tin on tin noise when the water simmers). Bring to the boil, reduce the heat, pop the lid on and simmer for 2 hours, keeping it topped up with water if the level gets close to the level of the top of the can. Set aside to cool completely before opening.
  2. Heat the oven to 170 degrees celsius (350 degrees F). Cream the butter and sugar until light and fluffy. Sift the two flours together and add to the butter mixture and mix lightly to form a dough. Press two thirds of the dough into a greased baking paper lined 20cm by 30cm tin. Bake for 15 minutes until firm, remove from the oven and cool slightly (about 5 minutes).
  3. Spread the tin of caramel over the top of the shortbread base, and crumble the remaining dough over the top of the base. Bake for 10 to 15 minutes until the top is golden brown.


Cool for 5 minutes and then cut into 1 inch squares, or larger slices if you prefer. Let it cool completely in the tin. Once cooled, put the jug on, invite your friends round and enjoy.


2 June 2013

Basil Pesto


It's hot! 45 degrees hot, that's really really hot! And my basil is dying, or was close to it, I revived it several times by drowning it in water 3 times a day, but the ambient heat had it wilting, so it's time to turn it into one of my favourite things - pesto!


I love the fragrant, fresh, earthy aroma and taste of basil pesto - used simply in a bowl of pasta, spread on pizza as an alternative to tomato sauce or dolloped elegantly onto a seafood canape, it enhances the most simple of ingredients.

Use this as a basic recipe, but if you prefer less garlic, or more cheese, simply add to taste. And you can freeze it, just pop it into ice cube containers, freeze, then pop cubes into a plastic freezer bags - it isn't as good as fresh pesto, but it's not far off.

Basil Pesto
  • 3 cups loosely packed basil leaves
  • 3 cloves garlic, chopped finely
  • 1/2 cup olive oil
  • 1/2 cup pine nuts
  • 1/2 cup parmesan cheese

Method
  1. Toast pine nuts over a low heat in a pan for a few minutes until just starting to colour.
  2. Quite simply...pop all of the ingredients into a food processor and blend until well combined, but still a bit chunky.


23 May 2013

Cheese Scones


There are a few recipes that I make so often, that they are scribbled out on post its and stuck to the fridge door - this is one of them. I got it from my mother's cookbook. She was an avid collector of recipes, she'd painstakingly cut them out of newspapers or magazines or jot them down on scraps of paper. Credit where credit's due, I think this recipe came from the monthly New Zealand Machine Knitters Society newsletter - always a treasure trove of tried and tested recipes.

The key to making a good light scone is not to handle the dough too much. When it comes time to add the liquid, do it swiftly and mix very lightly. This is a savoury scone, but you can make a sweet version by omitting the cheese, adding a tablespoon of sugar to the dry mixture, and then add dried ingredients of your choice. I like chopped dates and walnuts, or raisins and cinnamon with a pinch of mixed spice.


Cheese Scones

  • 575 grams flour (about 4 and 3/5 cup)
  • 3 teaspoons baking powder
  • 1 teaspoon salt
  • 100 grams butter, chopped finely or grated
  • 300 grams grated cheese
  • 450 mls milk 

Method

1.   Sift flour, salt and baking powder together.
2.   Rub in butter with finger tips until it resembles bread crumbs and mix in the grated cheese.
3.   Add in the milk and mix very briefly until it starts to come together.
4.   Tip onto the counter, and gently squeeze it together until it comes together into a dough.


5.   Press into a rectangle and cut into 12 equal pieces. Place onto a floured baking tray, and brush with milk.


6.   Bake at 200 degrees celsius for 12 to 15 minutes, until golden brown and cooked through.


22 May 2013

Chiang Mai Noodles


Recently, I've spent a lot of time baking, this time though, I'm heading back to my savoury roots and sharing one of my favourite noodle recipes - Chiang Mai Noodles. Whilst the name suggests the Chiang Mai region in Thailand, the dish itself doesn't bear the traditional hallmarks of Northern Thai cuisine, for a start it uses copious quantities of coconut milk that isn't traditional in northern thai food, but regardless of it's authenticity, it is lovely, sweet, sour and creamy with a decent wollop of heat.

The recipe below should make 4 servings, but to be honest, I eat big when it comes to curries so I pop it into two big bowls, and work my way quite happily almost all the way through one. I've also added fried tofu (stop gagging) and beansprouts, which are not traditional in the dish, but add texture and taste to the dish - as with most of my recipes, play around with the flavours and ingredients you like.


Chiang Mai Noodles
2 large servings, or 4 smaller servings

  • 250 grams fresh egg noodles
  • 1 to 2 small red chillies, deseeded and chopped finely
  • 3 cloves garlic, crushed
  • 6 asian shallots, chopped finely
  • 2 tablespoons good quality red curry paste (home made if possible)
  • 350 grams chicken breast, sliced finely into strips
  • 1 tablespoon chopped palm sugar
  • 2 tablespoons fish sauce (or to taste)
  • 1 cup chicken stock
  • 750mls coconut milk
  • juice of half a lime
  • small handful of chopped coriander leaves
  • 4 medium green onions, chopped finely
  • chopped red chillies for garnish
  • packaged fried noodles to garnish
Method


  1. Cook noodles for a few minutes in a pot of boiling water until cooked. Drain, drizzle with a little oil, toss and set aside.
  2. In a mortar and pestle (or small food processor), pound the garlic, chillies, shallots and curry paste until a thick and chunky paste.
  3. Heat a wok over medium to high heat, add a tablespoon or two of oil, stir in the paste mixture and stir constantly for a few minutes to cook out the raw taste of the paste, add the chicken and fry for a few minutes more until the outside of the chicken is cooked.
  4. Add the palm sugar, fish sauce, chicken stock, coconut milk and lime juice and simmer over a low heat for 5 minutes until chicken is cooked through. (add tofu here if using). Taste and add extra sugar or lime juice if needed.
  5. Place the noodles into individual bowls, scoop chicken pieces on top, and ladle curry soup on top. Garnish with spring onion, chillies, coriander and fried noodles. (add bean sprouts here if using).

15 May 2013

Beef Pide


I've been to Turkey a couple of times, and I love grabbing a seat at a street side restaurant and ordering a Pide - the Turkish version of Pizza, combined with a bowl of ezme (spicy tomato salsa) it is serious comfort food. The dough is easy to make and lovely and crispy, and you can play around with the toppings, much like any other pizza. Traditionally the meat would be lamb, so use that if you like, I just fancied a beef pide this time round. The egg on top is optional, but delicious, it makes the Pide almost pie like, and for me adds both texture and taste.

You can also make the dough and bake it plain, with a few herbs and olive oil, to make bread for dipping.

Turkish Pide

For the dough

  • 3 cups flour
  • 50mls olive oil
  • 1 cup warm water
  • 3 teaspoons dried yeast
  • 1 teaspoon sugar
  • 1 teaspoon salt


For the meat mixture

  • 1 tablespoon olive oil
  • 3 cloves of garlic
  • 1 onion, finely chopped
  • 500 grams minced beef, or minced lamb
  • 1 teaspoon ground cumin
  • 1 teaspoon ground coriander
  • 1/2 teaspoon smoked paprika
  • 1/2 teaspoon dried chile flakes (optional)
  • 1 can diced tomatoes
  • 1/4 cup chopped parsley
  • 2 tablespoons chopped mint
  • small squeeze of lemon juice
  • salt and pepper to taste
  • 4 eggs


Method

1.   Mix together the water, sugar and yeast and sit for 5 minutes until frothy. Put the flour, salt, and olive oil into a bowl and add the yeast mixture. Combine well, and knead for 5 minutes until the dough is smooth and elastic. Put into an oiled bowl in a warm place for an hour to rise.

2.  Saute the onion and garlic over medium heat until the onion is soft and translucent. Add the beef, cumin, coriander, paprika and chile if using and stir until the meat is browned.  Add the tomatoes, and cook out the moisture. Remove from heat, add a squeeze of lemon juice and the parsley and mint, season with salt and pepper to taste and stir.

3.   Roll out the dough into 4 ovals, pinch the ends to create a boat like shape and place on a baking tray.

4.   Spread the filling onto the base, leaving about a centimetre around the edges, and fold the edges of the dough up to form a shelf around the pide.

5.   Carefully crack one egg onto each pide, breaking the yolk, and bake at 200 degrees celcius for 15 minutes until the egg is cooked and the dough is crispy and brown. Serve with a spicy tomato salsa.