28 December 2012

Easy French Toast


Merry Christmas. We had a lazy hazy Christmas Day this year - hubby, me and the two little chefs. Traditionally our Christmas mornings start with opening the Santa sacks, followed by breakfast, followed by gift opening. I was allowed to open a present early this year. Can you guess why? 


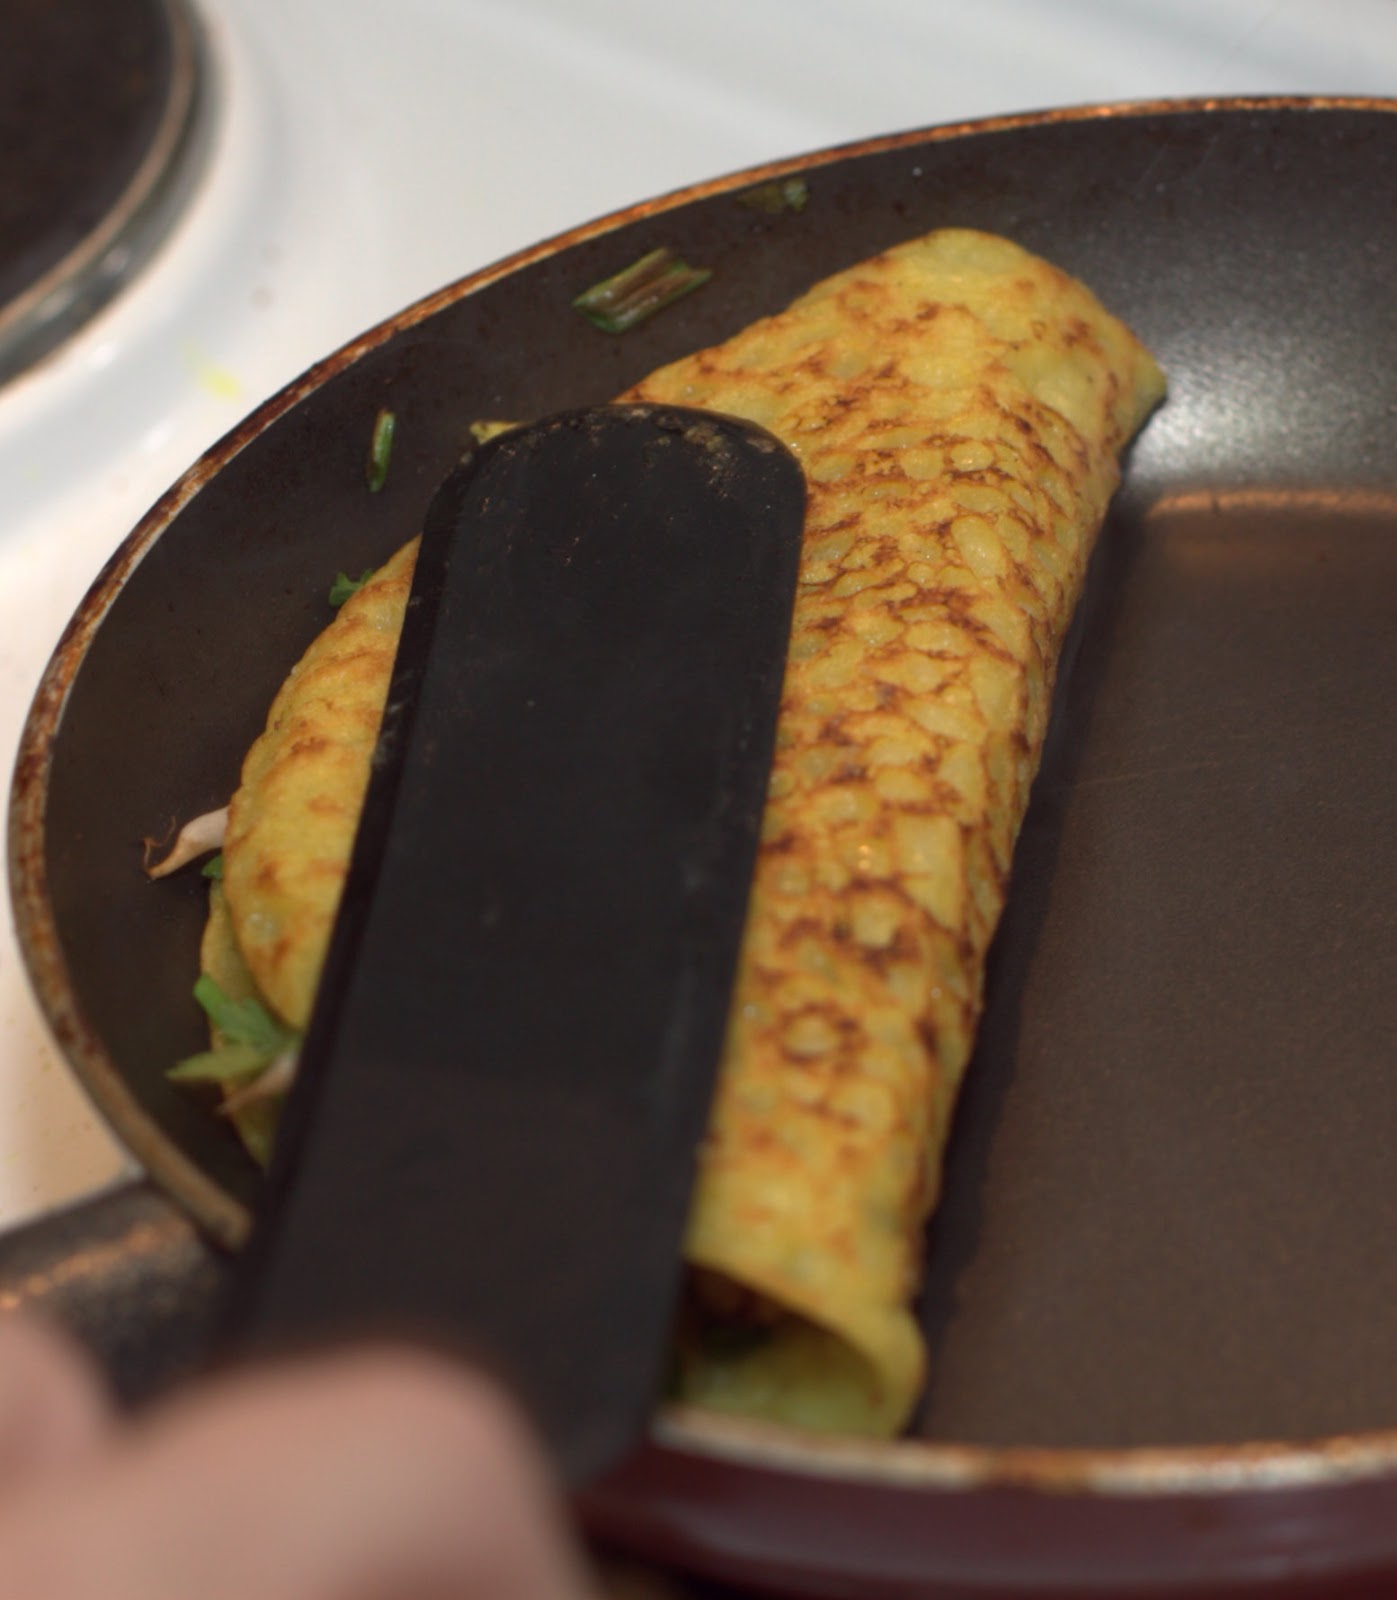
That's right! the little chefs bought me a frying pan for Christmas, a heavy duty, cast iron, non stick coated frying pan with a metal handle (for days I feel like finished off an omelet under the grill). 

I have been moaning and groaning this year whenever I make pancakes or french toast that my frying pan is awful and that's why they never seem to turn out right. I know that's not the reason, but it always seemed a good excuse.

So armed with a new heavy duty frying pan, a scribbled out copy of Alton Brown's French Toast recipe, some milk, cream, eggs and a loaf of day old brioche, I made breakfast. And they turned out fairly well. The little chefs gobbled them down gleefully.

I usually serve french toast with bacon and banana or a load of mixed berries that have been sprinkled with sugar and left for half an hour to release their juices.

French Toast
  • 2/3 cup milk (160mls)
  • 2/3 cup cream (160mls)
  • 4 large eggs
  • 2 tablespoons warmed honey or 1 tablespoon agave syrup (my preference)
  • 1/4 teaspoon salt
  • 1/4 teaspoon cinnamon (optional)
  • Loaf of day old bread
  • good quality maple syrup to serve
Method

1.   Whisk the eggs slightly, add the milk, cream, salt, cinnamon and honey or agave syrup. Whisk well.


2.   Cut the bread (I like using brioche) into thick (1/2 to 3/4 inch slices).


3.   Soak the bread one slice at a time in the egg mixture for 30 seconds each side, remove and place on a rack inside a pan to catch the drips. This makes it less soggy.


4.   Heat 1 tablespoon butter in a heavy duty frying pan over a medium heat and add the bread, cooking for about 3 minutes each side until golden brown. Pop into an oven dish and place in a 150 degrees Celsius oven until the rest are cooked.


5.   Serve with good quality maple syrup.


17 December 2012

Cranberry Chutney


I've said before that I was born in the wrong era, I love baking, but more than baking my favourite love is preserves (that and Asian fare). Turning a glut of fabulous fresh ingredients into a beautiful jar of tasty condiment that you can dollop on chicken or meat, served with an amazing cheese platter, or lift a burger from common to sublime makes me smile from ear to ear. This time of year gives me the perfect excuse to make one of my favourite chutneys - Cranberry.

I make it early, in November, so that my US and Canadian friends can enjoy it for Thanksgiving. It doesn't matter when I make it, it's always the same routine, I turn the Christmas music up loud, and dance my way around the kitchen while smelling the lovely Christmas spices in the chutney. Yum!

I bottle it like my mum used to, in sterilised jars in a water bath, but you don't have to, just pop the jars you're putting it into in the dishwasher and wash on a hot cycle, just store the finished chutney in the fridge and it will keep for at least 6 months and up to a year.

Serve it with cheese, on turkey or chicken, or both - my favourite way to use it is in Chicken, Cranberry and Brie Filos or Tarts.

Cranberry Chutney

  • 360 gram pack of cranberries (give or take 40 grams)
  • 1 cup water
  • 1 cup sugar
  • 1/2 cup cider or white vinegar (not malt, it's too strong)
  • 1/2 cup raisins or sultanas
  • 1/2 cup peeled, 1/2 cm diced apples
  • 1/4 teaspoon ground allspice
  • 1/4 teaspoon ground cloves
  • 1/4 teaspoon ground cinnamon
  • 1/4 teaspoon ground ginger

Method

1.   Bring the water and sugar to a slow boil in a large (and I do mean large) pot.

2.   Add remaining ingredients, return to boil and simmer for 20 minutes until apples are tender, cranberries have popped and squidged together and the sauce is fairly thick.


3. Pour into a dishwasher sterilised jar, pop the lid on and cool, then refrigerate.


10 November 2012

Lamb Murtabak


I spent over a year living and travelling in Indonesia and Malaysia. I met some wonderful people, saw some fantastic sights, and ate the most amazing food. Malay cuisine is my favourite food ever. If I ever had to choose my last meal, it would be a toss up between a good laksa, a classic Malay chicken curry, Mee Goreng (fried noodles), or a great Murtabak, smothered in a rich coconutty curry gravy.

Murtabak (or Martabak in Indonesia) is a common Indian Malay street food. It can be made with chicken, or vegetables, but traditionally and most frequently it's made with mutton. It's served with a rich coconut gravy.

This is my version of Murtabak. Makan Makan!

Lamb Murtabak

(I haven't included the recipe for the curry gravy here, any Malaysian curry sauce will work, in this case, I just blended some good quality Malaysian curry powder with some garlic, ginger, chopped onion and a chili. I cooked this paste on a moderate heat in oil for 15 minutes to cook out the raw taste of the curry powder, added in some coconut milk, star anise and a cinnamon stick and cooked for another 10 minutes)

  • 3 cups plan flour
  • 20 grams ghee
  • 1 cup warm water
  • 1/2 cup vegetable oil

for the filling
  • 30 grams ghee
  • 1 medium onion, finely chopped
  • 3 clovers garlic, minced
  • 1 teaspoon sambal oelek (or 1 small red chili chopped finely)
  • 1 tablespoon grated ginger
  • 2 tablespoons mild curry powder (I use Madras)
  • 1 tablespoon garam masala
  • 500 grams minced lamb
  • 2 tablespoons chopped coriander
  • 2 tablespoons chopped mint
  • 3 eggs, lightly beaten

Method
  1. Rub the ghee into the flour, stir in the water and mix to a soft dough, add extra water if the dough is too dry, or doesn't come together well, knead for about 10 minutes until the dough is very smooth and elastic
  2. Divide the dough into 12 pieces and pop into a bowl that has been greased with oil, cover and stand about 1 hour (traditionally the balls are covered with oil while resting - I just can't bring myself to add that much fat to the dough).
  3. To make the filling, heat the ghee in a pan and add the onions, garlic, sambal oelek and ginger, and cook stirring until onion has softened. Stir in the spices and cook for a few minutes to cook out the rawness of them. Add the mince and cook, stirring until the mince is cooked well. Add in the herbs. Cool and then stir in the beaten eggs.
  4. Spread a little oil over a smooth surface, press or roll out a ball of dough until a very thin square, about 25cm. Place 1/4 cup filling in the middle of the square, spread it out slightly, and fold the edges of the dough over to create a sealed parcel.
  5. Heat some extra ghee in a pan over medium heat, and cook parcels until well browned on both sides. Serve with the curry sauce. (I tip the whole tub of sauce over the murtabak so it is swimming in it).


2 November 2012

Tomato Chilli Jam


Peter Gordon is my all time favourite chef. He is the absolute King of Fusion, he  has the most amazing palate for mixing international flavours to create divine dishes. If you can get to Providores in London, or Dine in Auckland, do so, you'll be able to taste his wonderful blend of flavours. Here's his website to tempt your taste buds www.peter-gordon.net .

This Peter Gordon recipe is one I make often, and serve on most anything - it's great on burgers, with barbequed meats, or simply spread on thick sour dough toast and topped with fried egg. I love it with sweetcorn fritters, bacon and avocado, and 'watered' down with lime juice and water, it makes a great dipping sauce for Asian appetisers, like spring rolls or dumplings.

It's important that the tomatoes in this recipe are good quality with no blemishes, and ripe, but not too ripe. If they're too ripe, they'll lose their natural fruit pectic which helps to set the 'jam'. I also tend to make 3 or 4 times the recipe and bottle in nice jars, as it makes fabulous gifts.

I have a few jars hanging out on the bench if anyone wants any :)


Peter Gordon's Tomato Chilli Jam
makes 2 x 200ml jars
  • 500 grams ripe tomatoes, cored and diced into 1cm cubes
  • 4 red chillies, chopped
  • 5 cloves garlic, peeled
  • 6 cm thumb of ginger, peeled and grated
  • 2 tablespoons fish sauce
  • 300 grams caster sugar
  • 100mls red wine vinegar

Method

The Puree
 
After adding the extra tomatoes

The jam ready to bottle
 
  1. Place half of the tomatoes, chillies, garlic, ginger and fish sauce into a blender or food processor and blitz to a puree
  2. Pop into a pot with the sugar and red wine vinegar and heat slowly, stirring constantly until boiling.
  3. Add in the remaining tomatoes, bring back to the boil, turn down to medium and cook for 25 to 30 minutes until thick and 'jam-like'. Sometimes I find this can take about 45 minutes to reduce down.
  4. Pour into sterilised jars and seal. Just pop the jars into the dishwasher on a hot cycle, dry thoroughly, and if not using a water bath to seal then store the jars in the fridge, not the cupboard, the jam will last at least 6 months, unless like me....you scoff it in much less time. 


31 October 2012

Spicy Prawn and Chicken Skewers


The temperature has dropped over the last week and we're in the sweet spot of outdoor living - which means barbeque time. I get a bit tired of the usual steak, lamb chops and sausages, so this weekend I marinated some chicken and prawns, skewered them and fired up the barbie to give them a lovely smoky flavour. An added benefit to skewers, is that it's a fun way to children to try new food, neither of the little chefs had eaten prawns before this weekend, but were happy to try them on a stick.

Marinades are typically acid and fat based, so in this case I've used coconut cream as the fat component and citrus as the acid, and thrown in some serious flavour from herbs. When marinating prawns, go easy on the citrus and add more just before cooking - adding it too early may cook the prawns before they've even hit the grill (though would make for a nice prawn ceviche). I buy my prawns at Megamart as they're the only supermarket that will devein as well as peel the prawns.


Prawn Skewers

  • 500 grams prawns, peeled and deveined
  • 2 tablespoons green curry paste (Mae Ploy, Thai King, or even better home-made)
  • 1 teaspoon fish sauce
  • 1 clove of garlic, minced
  • small handful of thai basil, shredded
  • 200 mls coconut milk
  • 1 teaspoon grated palm sugar (use brown if you don't have it)
  • juice of a lime
  • 1/2 teaspoon grated kaffir lime rind (or 4 kaffir lime leaves, stem removed and shredded finely)

Method
  1. Put all but the lime juice and prawns into a food processor and blitz until well combined and basil is finely minced. Squeeze in half the lime juice
  2. Marinate the prawns in the mixture for at least an hour and up to 3 hours, stirring occasionally. Add in the juice of the remaining half lime.
  3. Thread onto soaked skewers and grill for 5 minutes on the barbeque turning frequently

Chicken Skewers

  • 500 grams boneless chicken thigh fillets, cut into 2cm cubes
  • 2 tablespoons Tandoor Paste
  • 200mls coconut milk (or 200mls thick natural yoghurt)
  • juice of half a lemon
  • 1 clove of garlic, minced
  • 1 chilli, deseeded and chopped
  • 1/4 cup coriander leaves

Method
  1. Pop all of the ingredients except the chicken into a food processor and blitz until well combined.
  2. Marinate the chicken for at least an hour or overnight
  3. Thread onto soaked skewers and grill for 10 minutes, turning frequently

22 September 2012

Banh Xeo - Crispy Rice Pancakes


One of my favourite Vietnamese snacks is Banh Xeo - a crispy Rice flour and coconut milk pancake, filled with chewy pork and prawns, fragrant fresh herbs like Thai basil, Vietnamese mint and coriander, and crunchy beansprouts. It's served with Nuoc Cham, the classic Vietnamese sauce, wonderfully sweet and sour with a pungent hint of fish sauce and a wallop of chillies.

I learnt how to make Banh Xeo in Hoi An in Vietnam, at a wonderful Vietnamese restaurant/cooking school Morning Glory. I had a private lesson with Mrs Vy the chef and learnt so much about Vietnamese cuisine. 'Xeo' means sizzling, and that's the sound you'll hear as the pancake batter goes into the pan. Traditionally these are sliced, popped onto lettuce leaves, and smothered in herbs, before wrapping the lettuce parcel up and dipping it in the sauce.

In Washington, I went shopping in a great little suburb called Georgetown and stumbled across a fabulous Vietnamese restaurant - their Banh Xeo didn't disappoint, and reminded me of how long it had been since I made them. So here I am, replicating another dish from my trip.

My version is a little different to the traditional way of preparing Banh Xeo. I add cornflour to the rice flour to make it firmer and less likely to break up, though even if they do break they taste fabulous anyway. I also fill the pancakes with everything including the herbs and serve with the dipping sauce, rather than slice it up, pop it onto lettuce leaves and put the herbs on top.

Here's one that didn't quite turn out right, but was delicious anyway.

For those in Doha, rice powder is the same as rice flour, and Vietnamese mint is hard to come by, I occasionally find it at Megamart, but use normal mint if it's not around.

Banh Xeo with Prawns and Pork

  • 2 cups rice flour
  • 3 tablespoons cornflour
  • 2 cups iced water
  • 400 mls coconut milk
  • 1 teaspoon turmeric
  • 1 teaspoon sugar
  • 1/2 teaspoon salt
  • 1/4 teaspoon white pepper
  • peanut oil to fry
  • 2 tablespoons mung bean paste (steamed mung beans ground to a paste with a little bit of water) optional
  • 1 cup beansprouts
  • 1/2 cup Thai basil
  • 1/2 cup Vietnamese mint leaves (normal mint is fine)
  • 1/2 cup chopped coriander
  • 300 grams pork, chopped fine and fried until crisp (I quite often use bacon)
  • 300 grams prawns, cooked and chopped
  • 1/2 cup chopped spring onions
  • 2 cups washed butter lettuce leaves
Nuoc Cham
  • 1/4 cup sugar
  • 1/2 cup hot water
  • 3 tablespoon lime juice (juice of a large lime)
  • 1/4 cup fish sauce
  • 1 clove garlic, minced
  • 1-2 bird’s eye chilies, cut into very fine rings
  • spring onion (optional)

Method

To make the Nuoc Cham, mixed all of the ingredients together and stir until sugar is dissolved, set aside to cool. You can add spring onions and/or coriander once cooled.


Make the pancake batter by mixing the rice flour, cornflour, salt, pepper, tumeric, water and coconut milk with a whisk until lump free. Cover and refrigerate for at least an hour, or overnight.


To make the pancakes, have everything chopped and ready to go. Heat a teaspoon of peanut oil in a small non-stick frying pan over medium to high heat, drizzle in a small ladleful of batter and swirl to coat the base (like you would a crepe). Listen closely and you'll hear the Xeo, it should sizzle away quite merrily.


Add in the pork and prawns, and cook for a minute or two. Check the bottom of the pancake, it should be lovely and golden and the top should be almost set.


Add in the spring onions.


Closely followed by the herbs and beansprouts.


Fold over carefully, and slide onto a plate to serve.


Cut into pieces, wrap each piece in lettuce and dip in Nuoc Cham sauce.


29 August 2012

Chicken, Prosciutto and Sage Risotto


I'm back! I've been away in the US for a month travelling with hubby and the little chefs, and we had a great time. I am pleased to be back though - living out of a suitcase and seeing a new town each day or two is fantastic, but when the holiday is over, it's nice to come back to our own place, shampoo in the right spot, clothes hanging in the wardrobe, trampoline out the back, and buckets and buckets of Lego. AND my kitchen! oh how I've missed thee, I unashamedly stand up straight, my shoulders broad, hand on heart and say "I LOVE TO COOK!"

Whilst I didn't cook on holiday (short of stir frying a pack of frozen PF Chang's noodles - which were OK mostly), We ate out most nights in the States, and I found some real gems, so I'm going to try and re-create my version of the stars.

We started in Houston visiting friends, and I must say I had the very best smoked pork ribs ever at our friends house, I would try and re-create it, but SP had the most impressive smoker I'd ever seen, so I don't think I'd come close.

Our next stop was New York! It blew me away, more than I ever thought it would, who knew such a big touristy city had so much character, from amazing scenery in Central Park, awe inspiring views from the Empire State Building, fantastic drama and musical productions to shopping and most importantly, the fabulous New York people. We ate bagels at a lovely cafe each morning, had cheesecake most nights, we dined sans little chefs in the infamous gangster ridden (probably not now) suburb of Hells Kitchen at a lovely Italian restaurant. I had a wonderful asparagus, sage and prosciutto risotto. Hubby's not a fan of asparagus so to re-create it I made a chicken, leek, sage and prosciutto risotto - the sage and prosciutto are the heroes. It's a flavour combination that goes together so well.

So here's my version of the one I ate in New York.

Happy Cooking
Gill

Chicken, Sage and Prosciutto Risotto
  • 600 grams chicken breast, cut into 1cm slices
  • 1 medium leek, sliced finely
  • 1.5 litres chicken stock
  • 1 cup white wine (or water if cooking halal)
  • 1 tablespoon olive oil
  • 40 grams butter
  • 2 cloves minced garlic
  • 2 cups arborio rice
  • 1/2 cup grated Parmesan cheese
  • 1 tablespoon lemon juice
  • 3 tablespoons shredded sage
  • 6 rashers prosciutto

Method

1.   Heat the grill and place the prosciutto on an oven tray, grill for two minutes each side until the prosciutto is fairly crisp, it will crisp up a bit more on standing. Cool and crumble.


2.   Put the chicken stock in a pot and bring to a gentle simmer, keep simmering whilst cooking the risotto.  Stir fry the chicken and leek in the olive oil for 5 minutes until leek has softened and chicken is cooked, remove from the pan.


3.   Add the butter to the pan with the garlic, and fry for 1 minute and add the rice, stir to cook and stir fry for a few minutes for the rice to toast nicely in the butter and garlic.


4.   Add the wine and stir until the wine is absorbed. Add the hot stock, one ladle at a time, stirring constantly until each ladle is absorbed before adding the next. Keep adding, and stirring until the rice is tender. It will take about 20 to 25 minutes.


5.   Add the chicken and leeks back in, a squeeze of lemon and cook for a minute to warm the chicken, remove from heat, add the Parmesan and sage, stir and serve with the prosciutto crumbled over the top and top with some slivers of shaved Parmesan.

26 July 2012

Homemade Vanilla Essence


I'm off on holiday tomorrow, and procrastinating about packing. So when there's something I don't want to do, I find an absolutely MUST, couldn't possibly not, how dire if I didn't thing to do in the kitchen. Today was easy. A lovely friend left Doha (not so lovely she left) and gave me her stash of Vanilla Beans.


They are heavenly and I racked my brains thinking about how best to use them to maximise their gorgeous gorgeous flavour. So I decided on Vanilla Essence (Extract for you American folk), for one thing we can't get the real stuff here - has alcohol in it, which is by and large taboo, unless you have a permit and shop at the one and only alcohol store. Whilst they stock alcohol, they don't stock vanilla essence. So I trotted on down, bought me a bottle of vodka and set to turning these delicious little numbers into Extract. Bear in mind that was 8 weeks ago, and today I decided to pop it into bottles to give as gifts (that was the MUST do in the kitchen thing).

Home made Vanilla Essence (Vanilla Extract)

  • 1 litre vodka
  • 10 - 15 whole vanilla beans (I used 10, next time I would definately use 15)

Method

Not too tricky really, slice the vanilla beans in half lengthwise and scrap out the seeds (I only scraped some of the seeds out, not all, but I think it would benefit from all of the seeds). Pop the seeds and the pods into a glass jar.


Cover with vodka and give a little shake.


Set aside in a dark cupboard for 8 weeks, shaking the bottle twice a week if you remember. Pop into bottles, add a vanilla bean to each bottle and share the joy with your friends. I popped 2 vanilla beans into each bottle so that when the bottle gets half way through it can be topped up with vodka, shaken and used a week or two later. It's the gift that keeps on going.

Here's a photo of the back of the bottle showing the colour of the vanilla essence. It could easily go a shade or two darker.


Bircher Muesli


This is my version of Bircher Muesli, it isn't the prettiest dish in the world, but it is easy and tasty and a fabulous way to start the day. The recipe makes enough for 2 or 3 servings and will keep in the fridge for 3 days. Bircher Muesli is one of those dishes that changes each time I make it, in this version I've used apple and cinnamon, but you can pretty much make any flavour you like - my favourites include mango & almond, and raspberries & sunflower seeds. I've used rolled oats as the base, but it's more commonly made with a good quality muesli. It's a great recipe for healthy alternatives as well, I'm off dairy at the moment so used goats milk yoghurt and rice milk. I strained the yoghurt in muslin for a few hours to drain out the liquid and leave me with a lovely thick greek style yoghurt.

If you're feeling organised, mix it then pop it into the fridge in jars. Great for taking to work as a mid morning energy boost.

Simple Bircher Muesli
  • 1 cup rolled oats or good quality muesli
  • 2/3 cup milk (you can use low fat)
  • 1 cup yoghurt (greek if you can get it)
  • 1/2 teaspoon cinnamon
  • 1/4 teaspoon nutmeg (optional)
  • 2 teaspoons honey or agave nectar
  • 1/2 cup unsweetened apple sauce
  • 1 grated apple

Method
  1. If you aren't using Greek yoghurt then drain the yoghurt in a muslin-lined sieve over a bowl for a few hours until it is nice and thick.
  2. If you don't have apple sauce, peel, core and slice two apples and put in a pot, just cover with water and cook for 10 minutes until tender. Blend apple slices with some of the cooking liquid to make the apple sauce. Cool before using.
  3. Mix all of the ingredients except the grated apple - taste and add more honey if required. Pop into the fridge overnight.
  4. The next day, grate the apple and add to the muesli and serve. I also added some fresh apple slices on top and a sprinkle of toasted coconut (because I had it in the cupboard), and it was delicious.