28 December 2012

Easy French Toast


Merry Christmas. We had a lazy hazy Christmas Day this year - hubby, me and the two little chefs. Traditionally our Christmas mornings start with opening the Santa sacks, followed by breakfast, followed by gift opening. I was allowed to open a present early this year. Can you guess why? 


That's right! the little chefs bought me a frying pan for Christmas, a heavy duty, cast iron, non stick coated frying pan with a metal handle (for days I feel like finished off an omelet under the grill). 

I have been moaning and groaning this year whenever I make pancakes or french toast that my frying pan is awful and that's why they never seem to turn out right. I know that's not the reason, but it always seemed a good excuse.

So armed with a new heavy duty frying pan, a scribbled out copy of Alton Brown's French Toast recipe, some milk, cream, eggs and a loaf of day old brioche, I made breakfast. And they turned out fairly well. The little chefs gobbled them down gleefully.

I usually serve french toast with bacon and banana or a load of mixed berries that have been sprinkled with sugar and left for half an hour to release their juices.

French Toast
  • 2/3 cup milk (160mls)
  • 2/3 cup cream (160mls)
  • 4 large eggs
  • 2 tablespoons warmed honey or 1 tablespoon agave syrup (my preference)
  • 1/4 teaspoon salt
  • 1/4 teaspoon cinnamon (optional)
  • Loaf of day old bread
  • good quality maple syrup to serve
Method

1.   Whisk the eggs slightly, add the milk, cream, salt, cinnamon and honey or agave syrup. Whisk well.


2.   Cut the bread (I like using brioche) into thick (1/2 to 3/4 inch slices).


3.   Soak the bread one slice at a time in the egg mixture for 30 seconds each side, remove and place on a rack inside a pan to catch the drips. This makes it less soggy.


4.   Heat 1 tablespoon butter in a heavy duty frying pan over a medium heat and add the bread, cooking for about 3 minutes each side until golden brown. Pop into an oven dish and place in a 150 degrees Celsius oven until the rest are cooked.


5.   Serve with good quality maple syrup.


17 December 2012

Cranberry Chutney


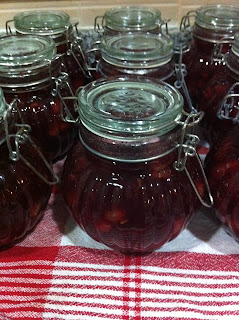
I've said before that I was born in the wrong era, I love baking, but more than baking my favourite love is preserves (that and Asian fare). Turning a glut of fabulous fresh ingredients into a beautiful jar of tasty condiment that you can dollop on chicken or meat, served with an amazing cheese platter, or lift a burger from common to sublime makes me smile from ear to ear. This time of year gives me the perfect excuse to make one of my favourite chutneys - Cranberry.

I make it early, in November, so that my US and Canadian friends can enjoy it for Thanksgiving. It doesn't matter when I make it, it's always the same routine, I turn the Christmas music up loud, and dance my way around the kitchen while smelling the lovely Christmas spices in the chutney. Yum!

I bottle it like my mum used to, in sterilised jars in a water bath, but you don't have to, just pop the jars you're putting it into in the dishwasher and wash on a hot cycle, just store the finished chutney in the fridge and it will keep for at least 6 months and up to a year.

Serve it with cheese, on turkey or chicken, or both - my favourite way to use it is in Chicken, Cranberry and Brie Filos or Tarts.

Cranberry Chutney

  • 360 gram pack of cranberries (give or take 40 grams)
  • 1 cup water
  • 1 cup sugar
  • 1/2 cup cider or white vinegar (not malt, it's too strong)
  • 1/2 cup raisins or sultanas
  • 1/2 cup peeled, 1/2 cm diced apples
  • 1/4 teaspoon ground allspice
  • 1/4 teaspoon ground cloves
  • 1/4 teaspoon ground cinnamon
  • 1/4 teaspoon ground ginger

Method

1.   Bring the water and sugar to a slow boil in a large (and I do mean large) pot.

2.   Add remaining ingredients, return to boil and simmer for 20 minutes until apples are tender, cranberries have popped and squidged together and the sauce is fairly thick.


3. Pour into a dishwasher sterilised jar, pop the lid on and cool, then refrigerate.