26 July 2012

Homemade Vanilla Essence


I'm off on holiday tomorrow, and procrastinating about packing. So when there's something I don't want to do, I find an absolutely MUST, couldn't possibly not, how dire if I didn't thing to do in the kitchen. Today was easy. A lovely friend left Doha (not so lovely she left) and gave me her stash of Vanilla Beans.


They are heavenly and I racked my brains thinking about how best to use them to maximise their gorgeous gorgeous flavour. So I decided on Vanilla Essence (Extract for you American folk), for one thing we can't get the real stuff here - has alcohol in it, which is by and large taboo, unless you have a permit and shop at the one and only alcohol store. Whilst they stock alcohol, they don't stock vanilla essence. So I trotted on down, bought me a bottle of vodka and set to turning these delicious little numbers into Extract. Bear in mind that was 8 weeks ago, and today I decided to pop it into bottles to give as gifts (that was the MUST do in the kitchen thing).

Home made Vanilla Essence (Vanilla Extract)

  • 1 litre vodka
  • 10 - 15 whole vanilla beans (I used 10, next time I would definately use 15)

Method

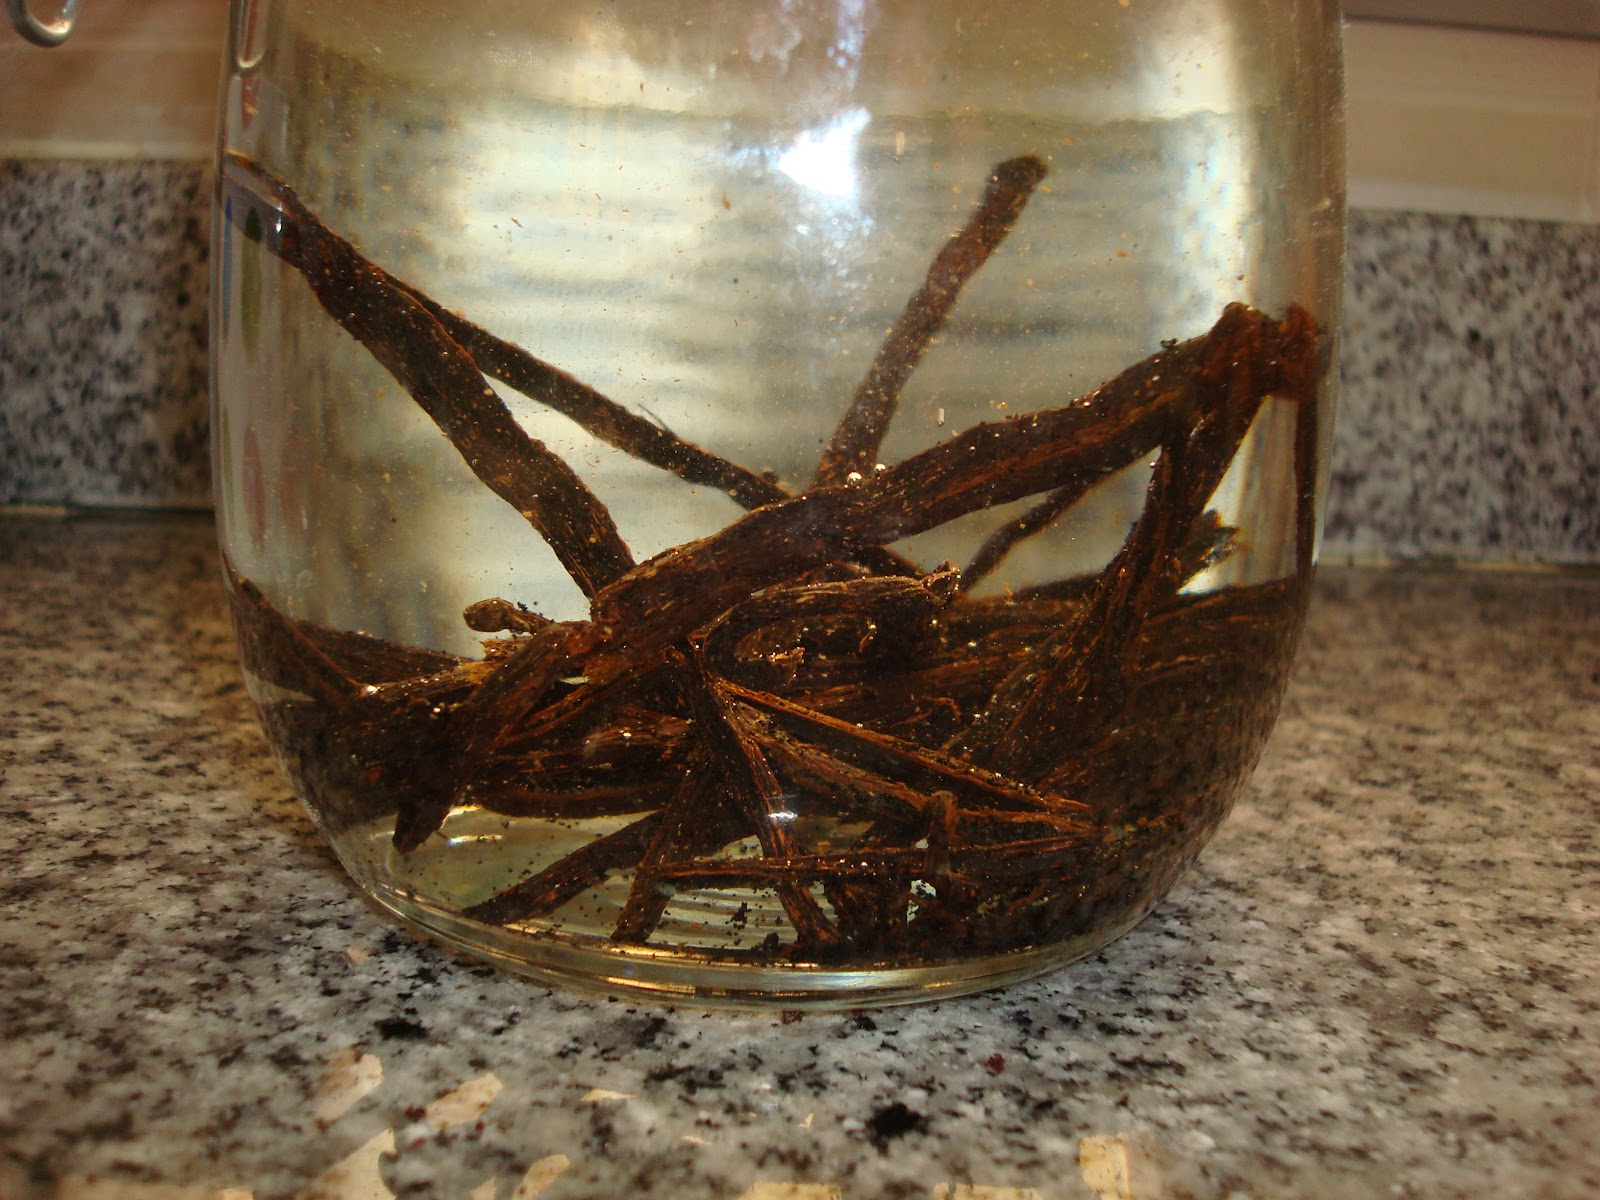
Not too tricky really, slice the vanilla beans in half lengthwise and scrap out the seeds (I only scraped some of the seeds out, not all, but I think it would benefit from all of the seeds). Pop the seeds and the pods into a glass jar.


Cover with vodka and give a little shake.


Set aside in a dark cupboard for 8 weeks, shaking the bottle twice a week if you remember. Pop into bottles, add a vanilla bean to each bottle and share the joy with your friends. I popped 2 vanilla beans into each bottle so that when the bottle gets half way through it can be topped up with vodka, shaken and used a week or two later. It's the gift that keeps on going.

Here's a photo of the back of the bottle showing the colour of the vanilla essence. It could easily go a shade or two darker.


Bircher Muesli


This is my version of Bircher Muesli, it isn't the prettiest dish in the world, but it is easy and tasty and a fabulous way to start the day. The recipe makes enough for 2 or 3 servings and will keep in the fridge for 3 days. Bircher Muesli is one of those dishes that changes each time I make it, in this version I've used apple and cinnamon, but you can pretty much make any flavour you like - my favourites include mango & almond, and raspberries & sunflower seeds. I've used rolled oats as the base, but it's more commonly made with a good quality muesli. It's a great recipe for healthy alternatives as well, I'm off dairy at the moment so used goats milk yoghurt and rice milk. I strained the yoghurt in muslin for a few hours to drain out the liquid and leave me with a lovely thick greek style yoghurt.

If you're feeling organised, mix it then pop it into the fridge in jars. Great for taking to work as a mid morning energy boost.

Simple Bircher Muesli
  • 1 cup rolled oats or good quality muesli
  • 2/3 cup milk (you can use low fat)
  • 1 cup yoghurt (greek if you can get it)
  • 1/2 teaspoon cinnamon
  • 1/4 teaspoon nutmeg (optional)
  • 2 teaspoons honey or agave nectar
  • 1/2 cup unsweetened apple sauce
  • 1 grated apple

Method
  1. If you aren't using Greek yoghurt then drain the yoghurt in a muslin-lined sieve over a bowl for a few hours until it is nice and thick.
  2. If you don't have apple sauce, peel, core and slice two apples and put in a pot, just cover with water and cook for 10 minutes until tender. Blend apple slices with some of the cooking liquid to make the apple sauce. Cool before using.
  3. Mix all of the ingredients except the grated apple - taste and add more honey if required. Pop into the fridge overnight.
  4. The next day, grate the apple and add to the muesli and serve. I also added some fresh apple slices on top and a sprinkle of toasted coconut (because I had it in the cupboard), and it was delicious.

22 July 2012

Roast Red Pepper and Goats Cheese Dip

When it comes to dips I tend to be a one track pony.


This dip is one I roll out regularly (that and my spinach and smoked feta dip). It's delicious, and teamed with some easy pita chips, it's always been a crowd pleaser.  There are a few steps to the dip, but if you're a girly-swot like me in the kitchen, you're bound to have a bag of frozen roasted peppers lurking in the freezer :) seriously though...I buy them when they're cheap, roast them off, peel them and pop them into a large plastic bag, flat in the freezer. This means the peppers are free flow and you can grab a handful out at a time. Great for salads, pastas or in this case...Dip. Alternatively keep a jar of store bought roast peppers in the cupboard. The goats cheese adds a lovely tartness to the dip, but on more than one occasion I've forgotten to put it in and the dip still turns out well, just up the anti a bit on the lemon juice to offset the sweetness of the peppers and the cream cheese.

Roast Red Pepper and Goats Cheese Dip

  • 2 large or 3 medium red bell peppers (capsicum) - this time I used one red and one yellow.
  • 200 grams cream cheese
  • 100 grams sour cream
  • 60 grams crumbled goats cheese
  • 2 teaspoons lemon juice
  • pinch white pepper
  • pinch salt
  • 1 clove garlic, crushed
  • Pita or Arabic Bread
  • Oil spray
  • your favourite seasoning - I like garlic salt, or italian blend herb seasoning mixed with sea salt

Method

Roast the peppers


Cut the peppers into quarters, removing the seeds and membrane, pop skin side up in a roasting pan under the grill and cook until starting to blacken. Put into a bowl, cover with plastic wrap and leave to cool. Once cool, peel the skin off the peppers and discard the skins.


Making the dip
  1. Put the red peppers, lemon juice and garlic into a food processor or blender and blitz until it's as smooth as you can get it.
  2. Add the cream cheese, goats cheese and sour cream and blend until combined. Season with the salt and pepper, and add more lemon juice if required.

Making the Pita Chips
  1. Pre-heat oven to 200 degrees celsius (400 degrees fahrenheit)
  2. Arabic bread has two layers, cut around the outside of the bread and peel the two layers apart.
  3. Spray each piece with oil spray and sprinkle with your favourite herbs and salt, or your favourite pre-mixed seasoning.
  4. Cut into triangles and bake for 3 to 4 minutes in the middle of the oven until brown and crisp. Be careful when baking, the difference between crisp and golden and in the bin black is a matter of seconds.

The pita chips will keep for 5 days in a sealed container, if they're a bit soft when you get them out, just pop them in a hot oven for 30 seconds to crisp up again. The dip will keep in the fridge for 3 days, unfortunately unlike most things I make, it isn't freezable, so you'll just have to scoff it all!

7 July 2012

Kathi Kabab - Indian Chicken Paratha Wrap


I've never been to India! I want to, desperately, but will wait until the little chefs are a little bit older. I have lots of Indian friends and have enjoyed learning to cook with them. This dish, Kathi Kabab, was made for me many years ago by a good friend in NZ. I sorted through my recipes recently and found a piece of notepaper that she'd written her recipe on, smiled when I remembered the fun times we spent in the kitchen together, donned my Apron and thought I'd give it a whirl.

You can make your own paratha, but in this case I've used the frozen paratha you can buy readily in supermarkets and that worked fine.

Thanks Deepti for the memories and the recipe.

Kathi Kabab
  • 2 teaspoons coriander seeds, roasted in a dry pan and ground
  • 1 dried chilli, ground
  • 1/2 teaspoon ground turmeric
  • 1 teaspoon cumin seeds, roasted in a dry pan and ground
  • 1 teaspoon garam masala
  • 3 tablespoons ghee
  • 6 cloves garlic, crushed
  • 2 cm piece of ginger, grated
  • 2 medium tomatoes, chopped finely
  • 2 small green chillies, seeds removed, chopped finely
  • 3 tablespoons coriander leaves, chopped
  • 400 grams chicken breasts, cut into small 1cm cubes
  • oil for frying
  • 8 eggs, lightly beaten
  • 4 frozen parathas
Method
  1. Half cook the paratha, i.e. cook each side until half cooked, set aside
  2. Heat the ghee in a pan and fry the garlic and ginger over a medium heat until starting to soften, be careful not to burn the mixture. Add the chilli, ground coriander and cumin seeds, turmeric and garam masala and fry for a minute or two until fragrant.
  3. Add the tomatoes and cook for 7-8 minutes until the tomatoes start to turn into a pulp. Add the green chillies, half of the coriander leaves and the chicken. Stirfry for about 10 minutes until chicken is cooked. Set aside, and keep warm.
  4. Pour a little oil into a non-stick pan and add 1/4 of the egg mixture, swirl to cover the base of the pan. Pop a paratha on top. Cook for a minute or two to set the egg and then turn the paratha over and cook the base for another minute or two until it is cooked through.
  5. Place a quarter of the chicken mixture down the centre of the egg topped paratha, sprinkle with coriander and fold in half. Repeat with the remaining ingredients.
  6. This is great on it's own but Dee used to make a mint chutney to go on it. Simply, puree in a food processor - 2 cups mint leaves, 2 cups coriander leaves, 2 green chillies, 4 cloves of garlic, 2cm of ginger, a teaspoon of sugar, juice of a lime and a big pinch of salt.